Homemade Bubbles for Kids

homemade bubbles

My kids love to blow bubbles.  Sadly, I have gotten to hate the smell of the dollar store bubbles.  When I found this, I realized it was cheaper and worked a whole lot better!  Give it a try!

You will want to grab some pipe cleaners from the Dollar Store so that you can make your own bubble blowers too.  We also als used some straws which were another great find!

To make the bubble solution, you will need:

  • 2 1/2 cups hot water
  • 1/2 cup light corn syrup
  • 1/2 cup liquid dish soap

Add 1/2 cup light corn syrup to the hot water and whisk well until it is dissolved. Stir slowly and try to avoid adding a lot of air to the mixture.   Slowly add the 1/2 cup liquid dish soap, and whisk well. Again avoid making a ton of bubble.

Cool and pour into a container.  Then you are ready to blow bubbles.  Plastic cups make great containers for kids to use!

How to Save Money When Buying Musical Instruments

how to afford music instruments

If you are looking to get your child started learning a musical instrument, you may find that the costs associated are quite high.   These instruments are expensive but there are few things you can do to cut costs and still get a great instrument. Here are a few ideas you can try to grab music instruments for a great price.

[Read more…]

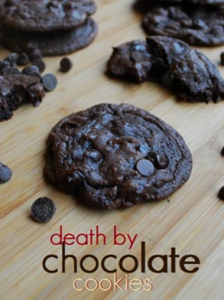
Death By Chocolate Cookies

death by chocolate cookies

I got some free cake mixes the other day.  One was a voucher that I got from Betty Crocker and two others were with coupon deals.  I just happened to have picked up Devil’s food cake and when I stumbled across this recipe…well I have to give it a go!  It is amazing, fast and money saving!  Since I got all the ingredients on sale or for free, they cost me less than $3 to make a whole batch.

These are addictive and amazing with vanilla bean ice cream.  You will also want to have some milk on hand!

Ingredients:

  • 1 box Devil’s food cake mix* (I used Betty Crocker brand)
  • 2 eggs
  • 1/2 cup oil
  • 1/2 cup semi-sweet chocolate chips
  • 1/2 cup milk chocolate chips
  • 1/2 cup dark chocolate chips

1. Preheat oven to 350 degrees F. Line two baking sheets with silpat liners or spray lightly with cooking spray. Set aside.
2. In a large bowl, combine the cake mix, eggs and oil with a wooden spoon, until blended, make sure there is no dry cake mix at the botton. Stir in the three kinds of chips until well mixed.
3. Drop large Tablespoonfuls of dough about 2″-3″ apart on the prepared cookie sheets. Bake for approx. 8-10 minutes, rotating pans halfway through cook-time to ensure even baking, or until the cookies are just barely set in the middle. This will make them chewy which is what you want for this cookie.
4. Remove from the oven and then allow the cookies to set on the cookie sheets about 5 minutes before transferring to wire racks to cool completely.

Store the cookies airtight, at room temperature, about 5 days. But they won’t last that long!

Want to take it up a notch?  Melt a little of the chocolate chips you have left over and then drizzle on the top!

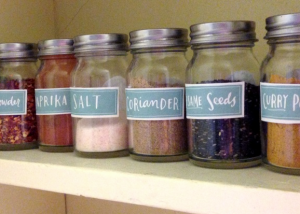
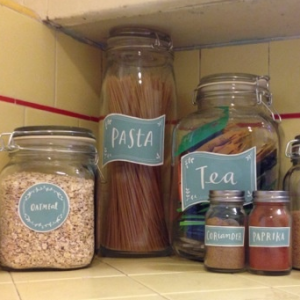
Cute DIY Labels for Your Pantry

DIY labels for PantyDIY pantry labels


I have a organizational addiction when it comes to the pantry.  If it is not totally organized and labeled, I freak out a little bit (okay a lot).  These are the cutest labels and best of all you can print them for free!  All you need in a sheet of label paper and you are set and ready to go!  You can print until your heart is content!

To make this craft even more thrifty, just save all of your old jars.  Jelly jars, salsa jars, mayo jars…you name it!  I personally like to save all the jars and then paint the lids black and seal them with Modge Podge.  Then add the cute stickers and you have a fancy storage system for just a couple bucks!